PCOMM Configuration
Note: Please click here to download PCOMM - https://tigerware.lsu.edu/Software/256/IBM-PComm#
Note: The Keyboard will need to be mapped in order for both of the “Enter” buttons to work correctly on the keyboard.
To Edit the Configuration:
1. Open Windows File Explorer.
2. Choose Computer or This PC in the left-hand menu and click Local Disk C:
3. Navigate to Program Files (x86) \ IBM \ Personal Communications \ Private.
4. Select the PCSWINKB3 or PCSWINKB5 file and copy it.
5. Paste the file to a readily accessible area (such as your desktop).
6. Open PCOMM and select Edit, choose Preferences, then select Keyboard.
7. Choose "User defined" next to "current keyboard".
8. Select Browse.
9. Navigate to the file where you pasted the PCSWINKB file (from step 5) and select it.
10. Click OK to save.
Note: If "pcswinkb3" or "pcswinkb5" are not available, or if you'd like to further customize your keyboard functions, please see the manual configuration instructions below.
To Edit the Configuration Manually:
1. Open an LSU Mainframe session by double clicking LSU_Mainframe_PComm configuration file (likely in your downloads or saved to your desktop).
2. Click Edit, choose Preferences, select Keyboard, then click the Customize button.
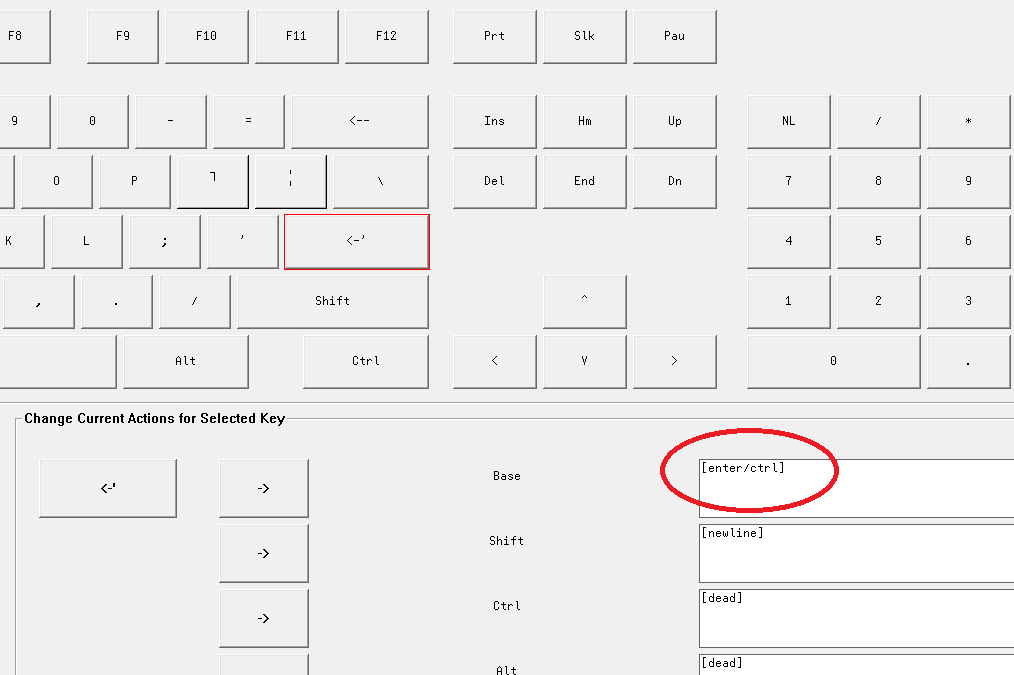
3. On the sample keyboard shown on the ensuing screen, click the Enter key labeled like this: <-‘
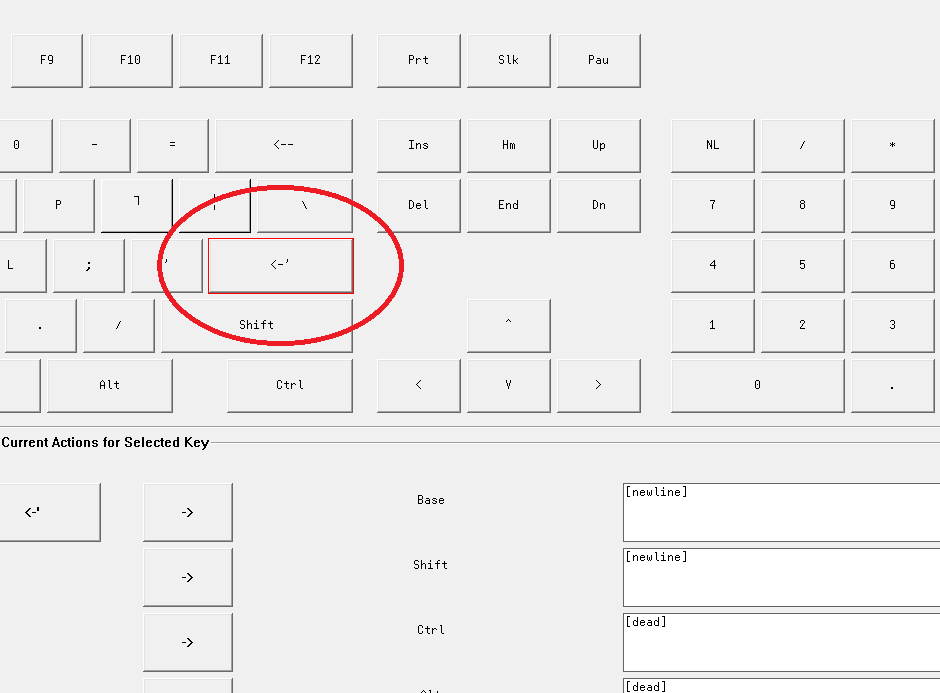
4. Under the “Change current actions for selected keys” section, click in the field to the right of Base and make the following change exactly (including square brackets): replace [newline] with [enter/ctrl].
5. Click File, choose Save As and name the file “keymap1.kmp”. Then click File and choose Exit.

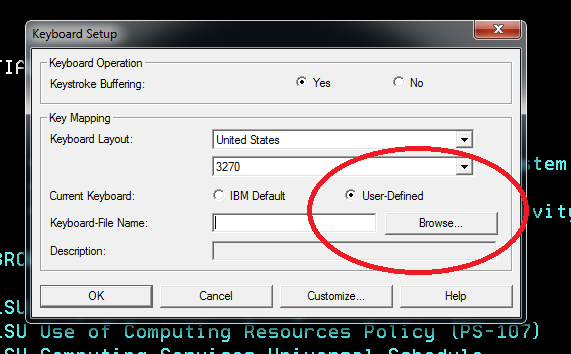
6. On the Keyboard Setup dialog box, change the selection from “IBM-Default” to “User-Defined” and then click the Browse button.
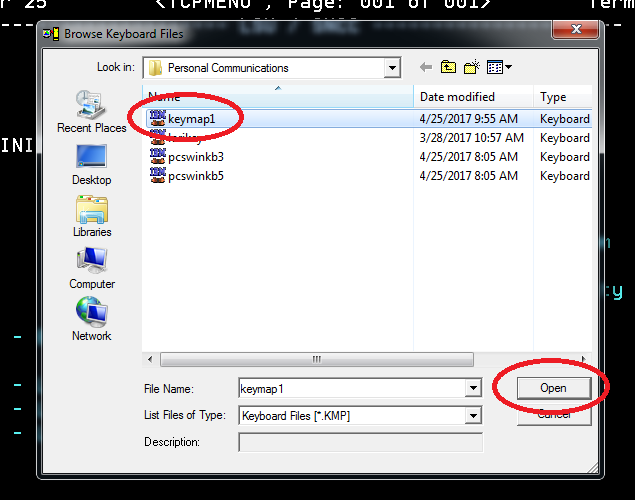
7. Click on the file “keymap1” to select it and then click the Open button at the bottom right.
8. Click the OK button to accept changes and the Enter key should now work as desired.
9. Save the changes by clicking on File, then choosing Save As to your desired location and name the WS profile as see fit.
Note: If you are using Windows 10 the file may be blocked from being installed. You may need to turn off UAC, SmartScreen settings and log on as Local Administrator to install it. So if a user runs into issues, they may need to right click on the file and "Run as administrator" before installing.
For additional assistance, you can contact the Service Desk at 225-578-3375.