Windows 10: Uninstall Network Adapter
There may be broken links in this article, the GROK staff has been notified and is working to resolve the issue.
If your network stopped working after a recent update, try uninstalling the network adapter. After uninstalling, restarting your computer will connect it to the latest driver.
To Uninstall a Network Adapter Driver in Windows 10:
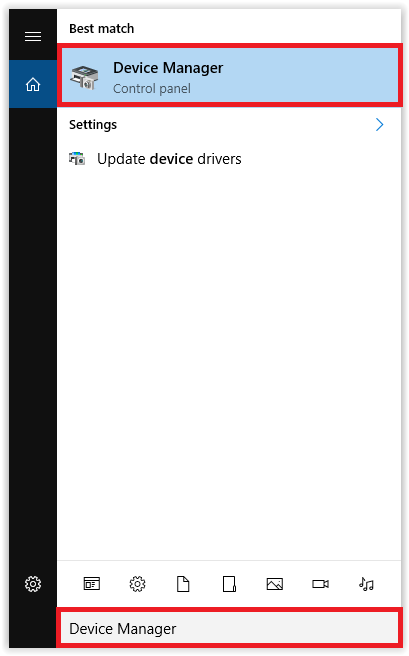
1. Click the Windows icon in the bottom left corner of the screen, and type Device Manager into the Search bar.

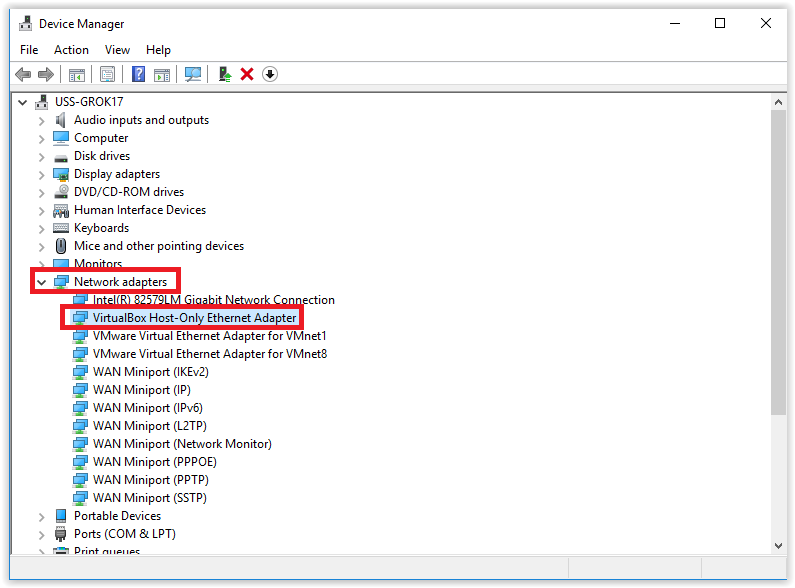
2. The Device Manager should appear. Locate the Network Adapter drop down, and choose the adapter you wish to uninstall.

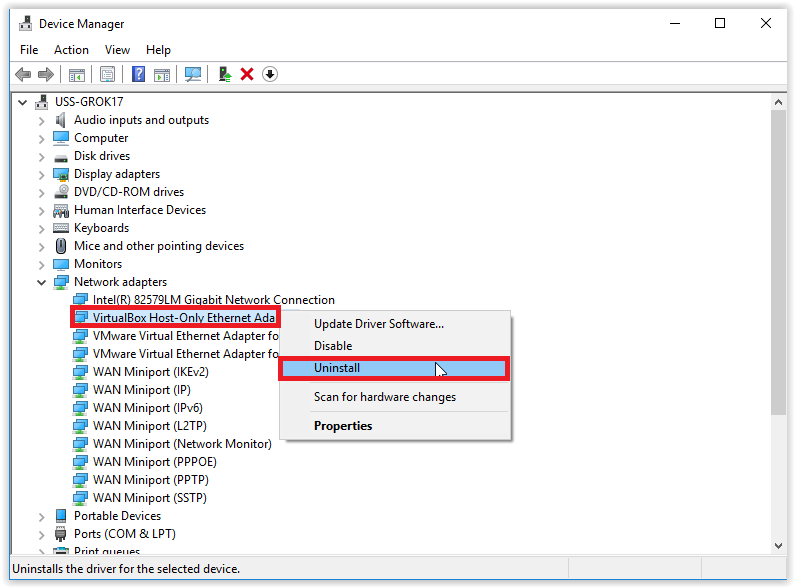
3. Right-click the network adapter, and click Uninstall.

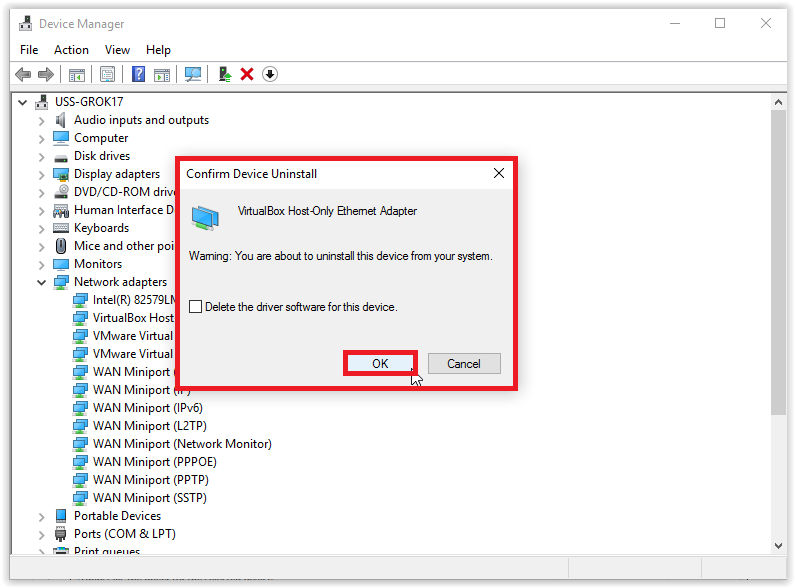
4. The program will confirm the uninstall. Click OK to continue.

5. After it is finished uninstalling the driver, restart your computer.
Referenced from: Microsoft
19482
4/3/2025 3:35:22 PM